Home » Full Spine vs Stitch Imaging X-Ray (Explainer)
In certain environments, Gonstead Chiropractors commonly request a full-spine x-ray image. This type of x-ray captures the entire spine, from the cervical region to the lumbar spine.
In this blog, we will :
- outline how to achieve a full spine x-ray image
- describe stitch imaging x-rays
- list the pros and cons of each.

Sam, Medic Cloud Managing Director
How do I achieve a full spine x-ray?
You can achieve this type of image in one of two ways:
- Stitching together sectional x-rays or
- Obtaining a single image using a full-size digital radiography (DR) panel.
Each option typically produces the same result: an x-ray image of the full spine.
Full spine image vs stitch imaging
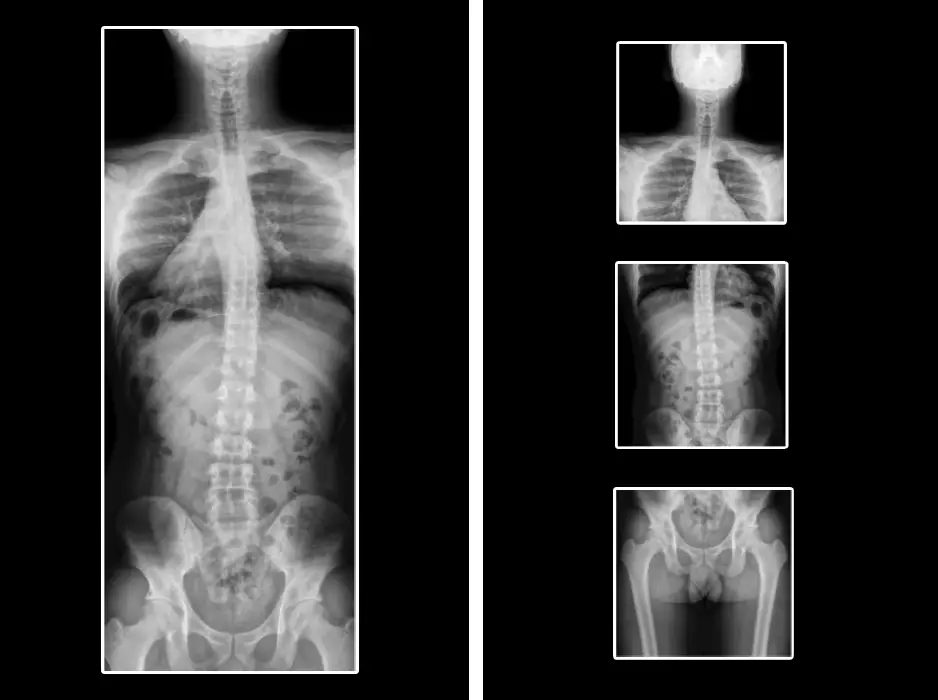
Full spine x-ray images
(L): Full spine image -single image.
(R): Images representing the Cervical Spine (Cervical), Thoracic Spine
region, the thoracic spine (thoracic lumbar spine region)
and the Lumbar Spine.
(R): Images representing the Cervical Spine (Cervical), Thoracic Spine
region, the thoracic spine (thoracic lumbar spine region)
and the Lumbar Spine.
Full spine x-ray image in stitching mode
In stitching mode, we overlay three images and “stitch” them together to create a final full spinal image. The image produced by a full spinal DR panel will be identical to the examples presented below.
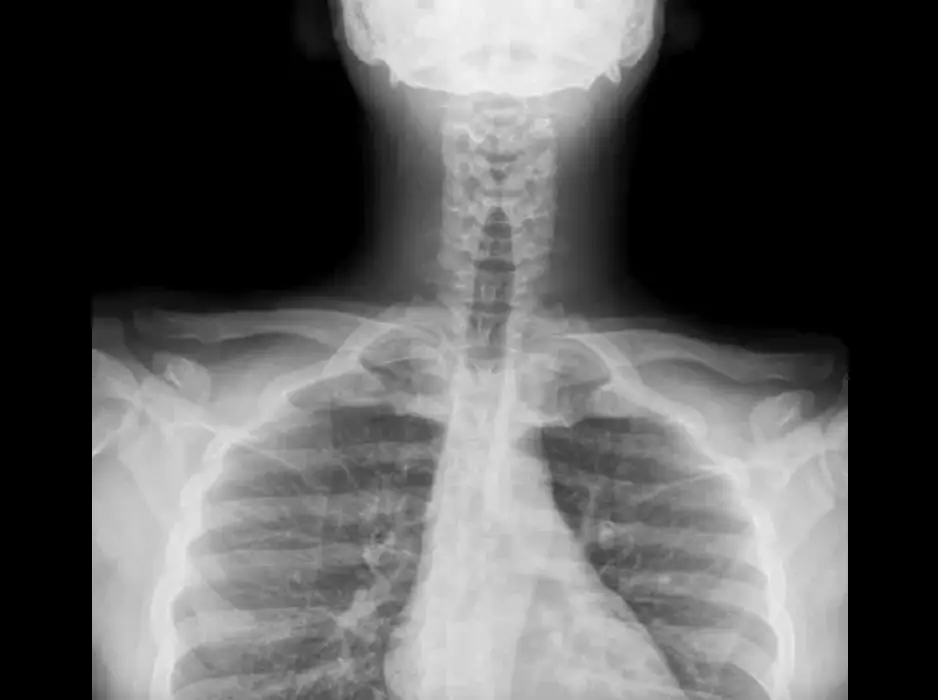
Cervical Spine or Cervical and Thoracic Spine region

Thoracic spine or the thoracic lumbar spine region
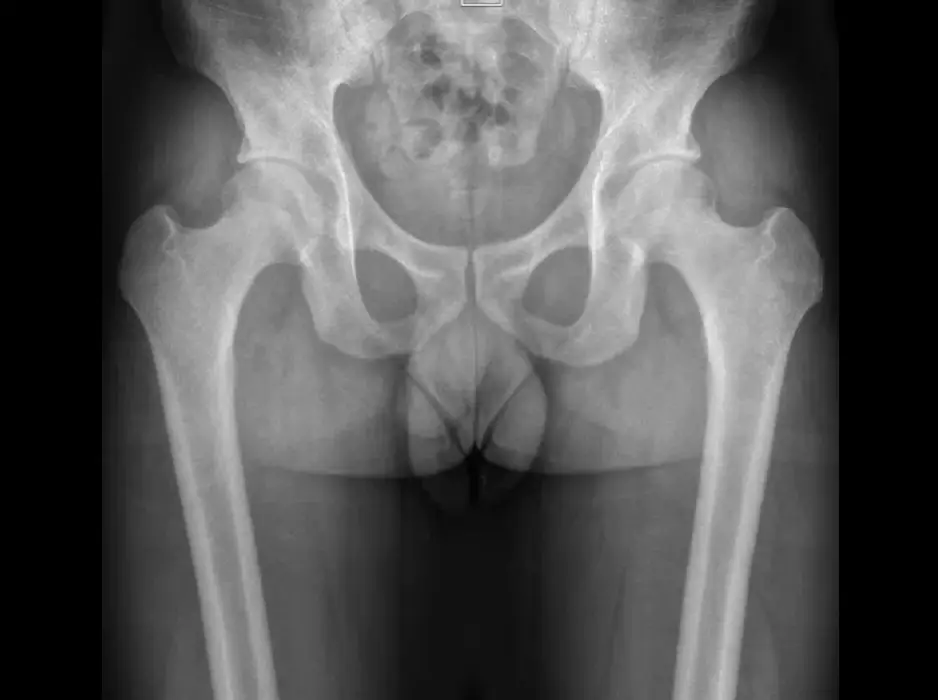
Lumbar spine
How to stitch x-ray images
This YouTube video describes how to stitch x-ray images using the DRGEM RadMax version 3 software. Read out our DRGEM product range.
The first step would be to take your patient x-ray, apply cropping and editing and then use the software to stitch the images.
How to perform image stitching in RADMAX
Image stitching in RADMAX
Sam Ogutucu from Medic Cloud explains how to stitch images using the RADMAX Version 3 software.
Stitched x-ray images pros and cons
Pros
- Individual control on your factors for each region of interest, ensuring you following ALARA principles at all times.
- Easier to stitch images of a taller person, thus not being limited to the height of the individual due to panel size restrictions.
- Easier to stitch images of a shorter person where you can potentially get away with a combined cervical and thoracic shot, followed by a lumbar shot.
- Cheaper to work with a standard size DR panel instead of full spine panel.
- Standard size DR panel will work with all wall and table buckys.
Cons
- Additional steps required to stitch the images (during or after the x-ray is taken).
- Minor overlay of 1-2 cm required between your x-ray images during x-rays to allow room for stitching.
Full spine x-ray image pros and cons
Pros
- Full size DR panel that allows up to 86cm of image to be taken.
- Abillity to utilise a grid on your standard size DR panel.
- To obtain a full-spine set requires an ability to have a longer room for an increase in focal distance between your tube and wall bucky.
- Single image acquisition.
- No editing of images for stitching.
Cons
- Will require a custom bucky to fit in to.
- More expensive.
- Will require Nolan filters as you are using the densest part of patient body to complete the exposure.
- Longer training required on the use of Nolan filters.
- Shadows cast over your images due to the use of Nolan filters.
- Lumbar spine region with hips will increase collimation area to thoracic and cervical region, thus increase in dose to patient.
- Larger room required for the x-ray system to gain the distance for a full spine.
Read more blogs


Subscribe to Medic Hub
Get the latest insights direct to your inbox.